Authentik
This guide will show you how to use Secured Signal API as an authenticator in Authentik.
Setup
1. Stage
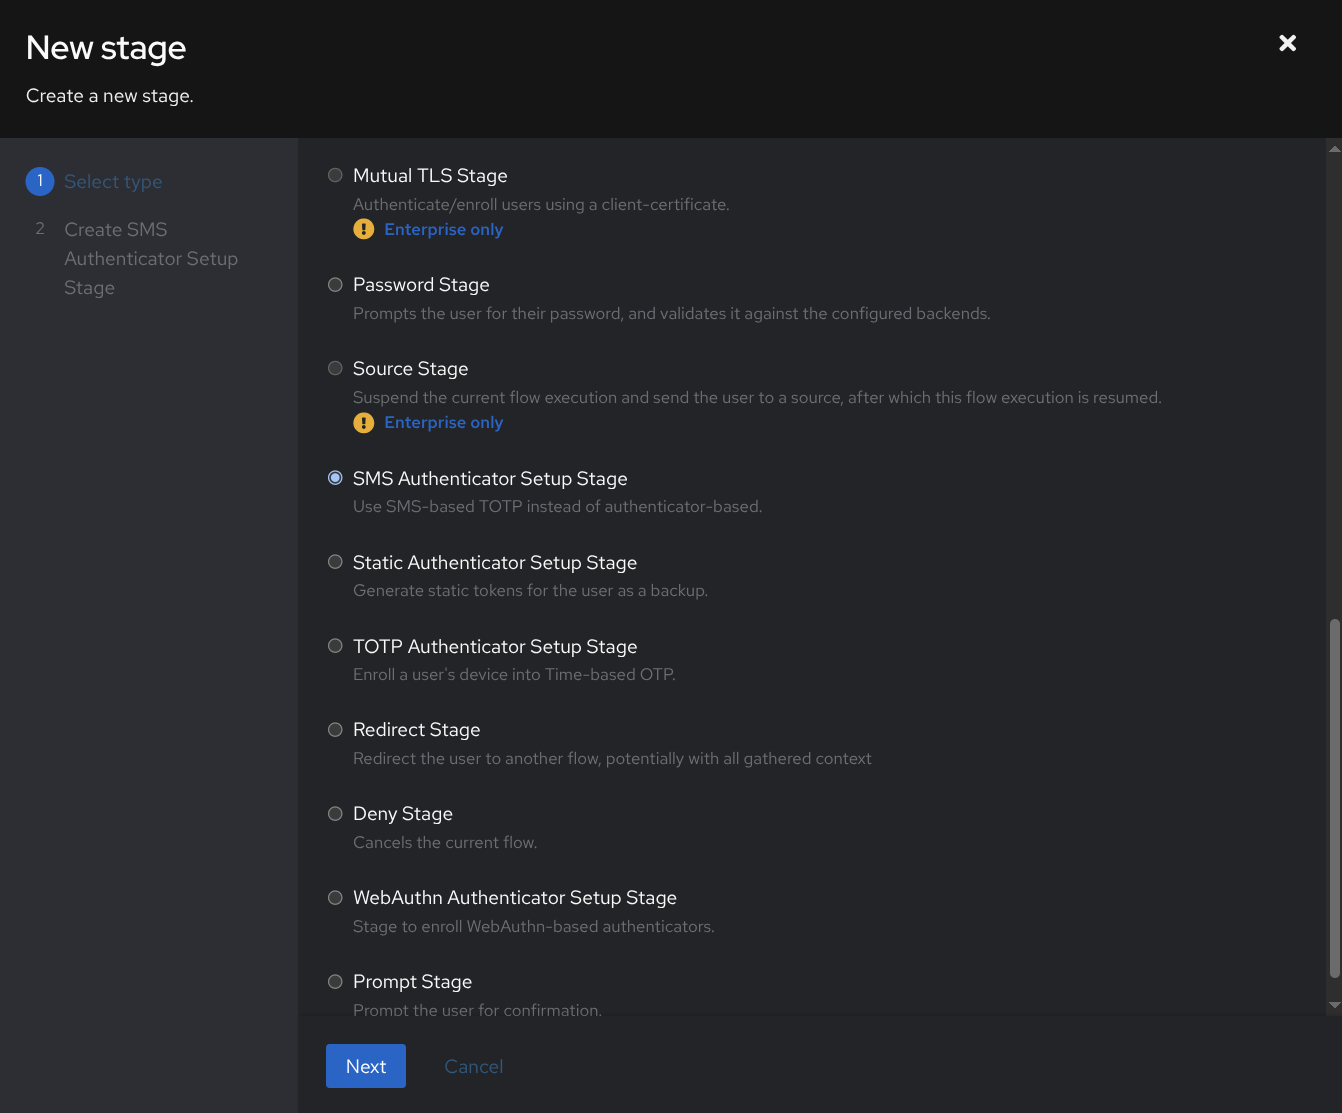
First you need to create the SMS Authenticator Setup stage.
Go to Flows and Stages > Stage > Create.
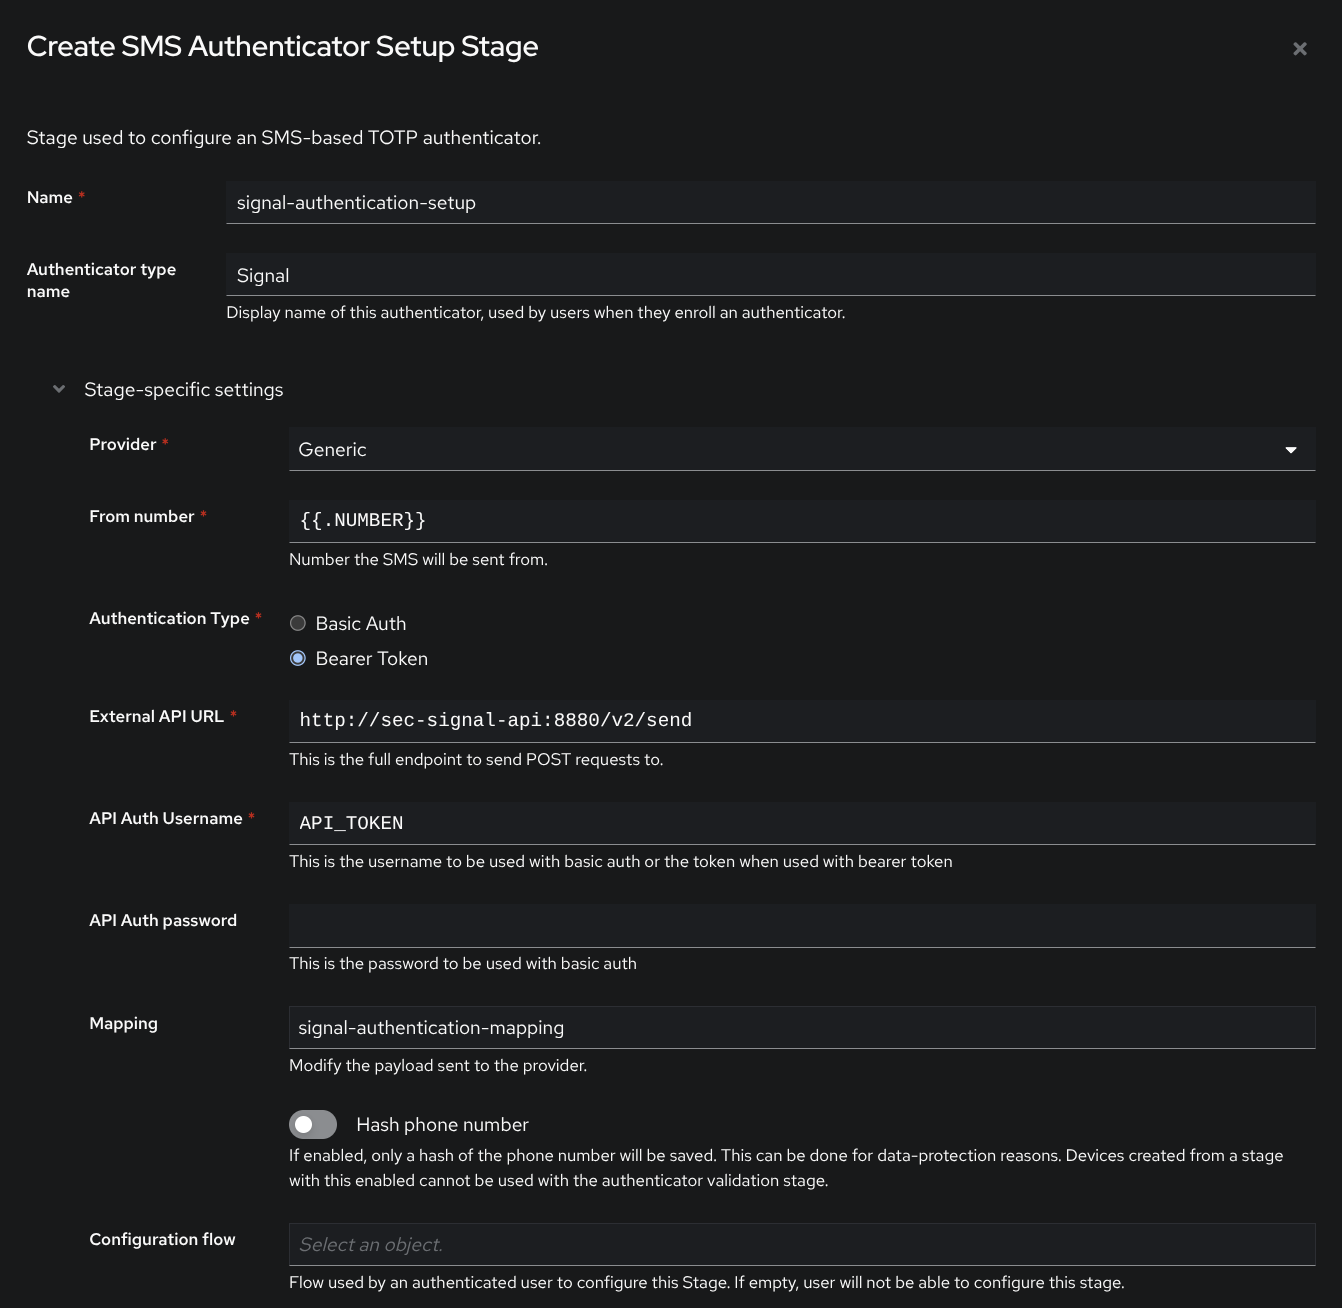
Then you need to fill in your API token and your sender number (make sure to use the Generic provider).
Point the API URL to your Secured Signal API (/v2/send).
2. Flow
Go to Flows and Stages > Flows > Create.
After you have created the stage you need to use it in a setup flow. Create one like in the screenshot below.

Note down your slug, you will need it later…
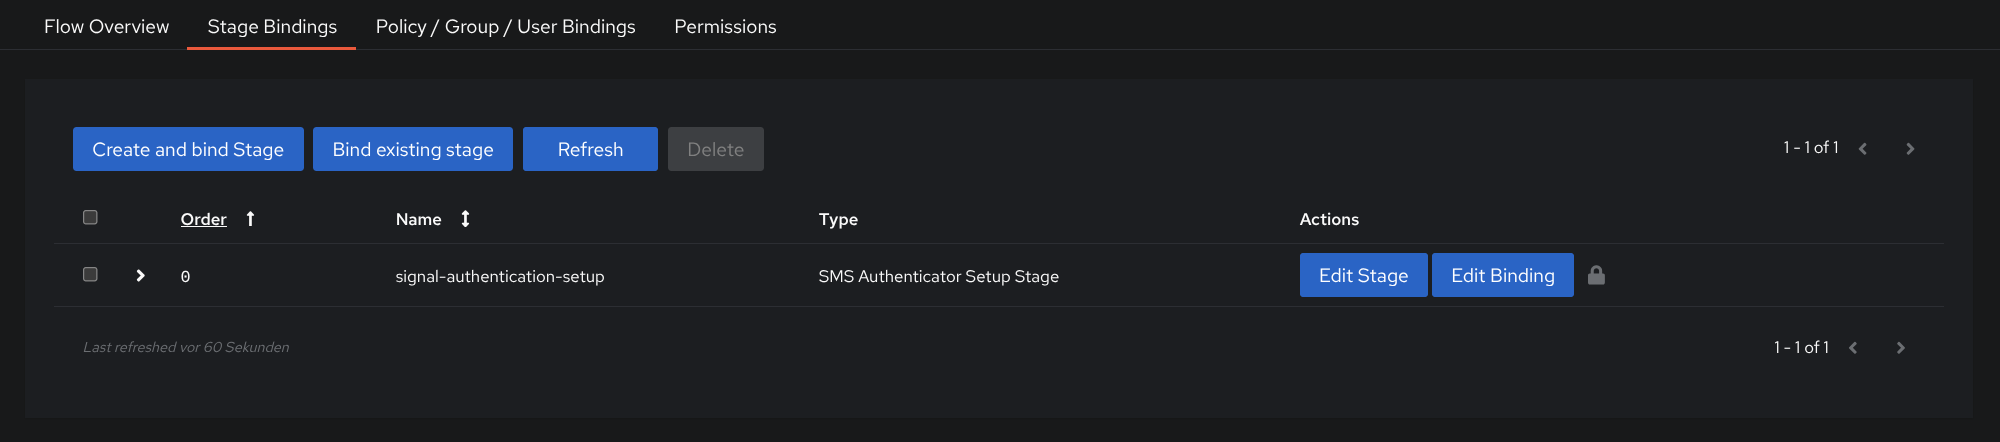
Once you've done that you will have to bind the previously created stage to the flow like so:
3. Webhook Mapping
Now we have to create a custom webhook mapping.
Go to Customization > Property Mappings > Create.
And select Webhook Mapping.
Simple

Advanced
For advanced setups or if you want to manage message content with Secured Signal API you may use this webhook mapping instead.
Click to see screenshot

return {
    "recipients": [device.phone_number],
    "token": f"{token}",
    "number": f"stage.from_number}"
}
Take a look at Authentik's expression documentation for all the available variables.
Since you have decided to go the advanced way, you will have to use Message Templates, here is an example:
settings:
  message:
    template: |
      **Your Verification Code**

      Use the verification code below to complete your sign-in:

      {{ @token }}

      This code expires in 5 minutes⏱️.
      If you didn't request it, you can ignore this message.
4. Enable SMS-Verification
To be able to use the newly created authenticator you need to enable SMS-based Authenticators in default-authentication-mfa-validation.
Go to Flows and Stages > Stages and edit the default-authentication-mfa-validation stage.
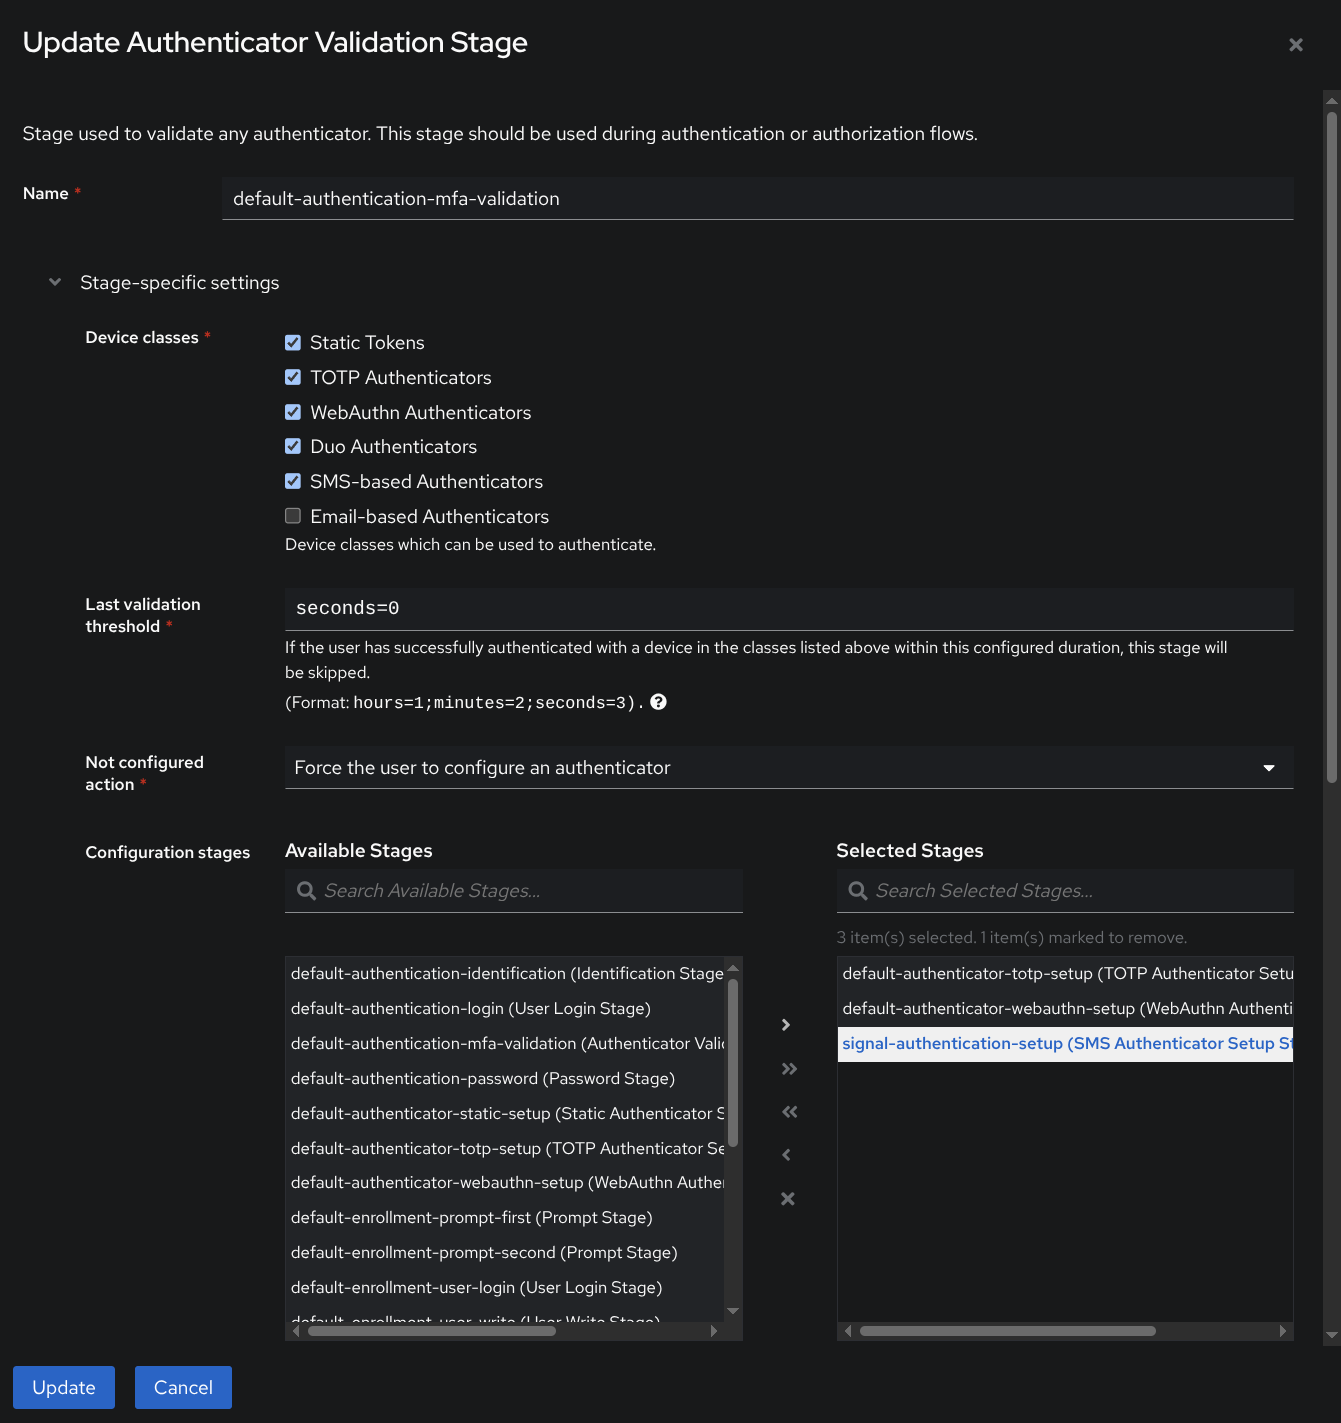
Check SMS-based Authenticators and add your signal-authentication-setup stage.
Register
After completing the setup, you can finally go to https://authentik.domain.com/if/flow/<your-slug> and finish the SMS Authenticator setup.